MY TECHNICAL TIPS
MY TECHNICAL TIPS문서의 기본 구조C 드라이브가 알 수 없는 이유로 용량이 부족할때발생이유해결책AVISynth Scriptffmpeg을 사용한 Image to YUV 등ffmpeg / DASH ffmpeg / AVISynthAVISynth 동영상 편집과 관련된 거의 모든 부분ffmpeg / Lossless H.264 Encodingffmpeg/xvid LosslessAVISynth 사용시 발생하는 문제점Bitnami Redmine Subversion Server 운용법SSH , wget, ftp 사용법등ftp 사용법ftp 를 파일을 사용하여 작동시키는 방법wget 사용법SSHSSH Client for Windows commandlineSSH에 Password 를 포함하여 실행PowerPoint에 추가 기능 넣기ffmpeg / AAC Audio를 포함하는 경우 MP4 다중화Subversion Command Line 사용법Windows BatchFile 사용법ffmpeg : Frame 단위로 Contents 자르기Transcoder System 에서 TS 만드는 방법ffmpeg 의 프로그래밍디렉토리 구조Project PropertyC/C++LinkerDLLSav_Log 사용법Multimedia FIle을 열고 닫는 법Media File의 디코딩Find Video and Audio Stream in MediaFind Video and Audio Codec in MediaInitilize Codec ContextDecodingDefinitionsProcessingTranscoder System 에서 TS 만드는 방법 [2]비트레이트 변경 방법ffmpeg MP4 에서 HEVC ES extract 방법ffmpeg Video Slide Showffmpeg 의 프로그래밍 [2]인코딩인코딩 준비인코딩 parameter 세팅인코더 초기화EncodingMuxingffmpeg의 IO 방식AVISynth의 기본 명령어 사용법 (Case by Case)Bitnami Redmine Stack에서 Subversion Server 설정Subversion Config 파일 수정 WIndows 방화벽 세팅DebuggingRepository 경로 문제Filesystem 문제Xming을 PuTTY와 연결해서 간단하게 원격 연결 사용하는 방법Xming 설치Display setting바로 창을 실행할지 선택하는 화면Specify Parameter SettingsFinal SettingPutty 주소 세팅X11 Forward SettingPutty SSH 연결구동 예Linux Shell Script표준입력, 표준에러, 리다이렉션, 백그라운드Process 찾기Windows 용 Subversion 설치SVN Reposoitory Windows 서비스 등록방화벽 해제Windows 배치 파일, For 문 사용한 변수배열 실제 For문 사용한 변수배열로 만들어진 배치파일SSH connection without PasswordApache 서버의 설치와 기동To Install Apache as a service:Other Command line options:Git SSL 관련 디버깅Clone 시 https 에서 Clone 이 제대로 되지 않을 떄WebDAV 기반 Git Server 설치httpd.conf 에서 WebDav 활성화 시키기Debugging : WebDavLockDB 설치https (SLS) 기반 Git Server 설치간단한 Git Checkout 사용법Git Checkout : 특정 커밋으로 돌아가기Secure Copy (SCP) 사용법Remote 서버에 파일 올리기Remote 서버에서 파일 받기자주사용하는 옵션ETRI에서 SSH 사용한글이 깨지는 문제Marp에서 Align Environment in Math modeVisual C++ 2013에서 Python Embedding참고 사이트Python EmbeddingMarkdown : Typora 관련수식 Reference [ Python ] URL에서 가져온 파일명 그대로 추출하기[Python ] 리스트 더 알아보기list와 string - .split(), .join()slicestepslice로 리스트 수정하기우분투 18.04 VPN 자동 연결 설정준비 사항네트워크 매니저(GUI 방식)네트워크 매니저(CLI 방식)네트워크 매니저 디렉토리에 새로운 연결을 만들 파일(vpn) 생성특정 연결이 네트웍에 연결될 경우 자동으로 vpn을 연결할 경우ffmpeg WMV 만들기Ubuntu에서 Python 버전을 변경하는 방법Ubuntu에서 시놀로지 open VPN 연결방법Windows 제어판에서 안보이는 프로그램 삭제
기존의 Docx 기반 Technical tips 의 한계를 극복하고 Markdown 방식으로 Technical Tips를 기록한다. 훨씬 쉽고 그리고 훨씬 가볍게 가능하다. 뿐만 아니라 관련 그림이나, html을 한번에 만들 수 있으므로 훨씬 효율적으로 노트를 작성할 수 있다. 이제 새로운 시작!!!
문서의 기본 구조
My_Technical_Tips.md 파일을 작성한 후 이를 My_Technical_Tips.html 로 변환한다. 이때, 관련 그림들은 MyTTfig* * 에 일괄적으로 저장하여 html 파일에서 읽어들일 수 있도록 한다.
C 드라이브가 알 수 없는 이유로 용량이 부족할때
c:\windows\temp 디렉토리에 MSI*.log 파일이 무더기로 쌓여 있다. 1 파일당 크기는 약 3MB 인데 이것이 너무 많이 있기 때문에 하드디스크 용량이 부족해진다. 이를 탐지할 수 있는 방법은 ** TreeSizeFree ** 같은 파일 크기별로 정보를 알려주는 프로그램을 사용하여 파일의 크기와 위치를 탐지하는 방법이 있다.
발생이유
기본적으로 Visual Studio 2013 때문에 발생하는 것이다. 이것이 정상적으로 설치되지 않거나 License 문제등이 탐지되면 MSI*.LOG 파일을 생성하게 된다.
해결책
단순히 지워버린다. 너무 많으니 * DEL MSI.LOG ** 같이 하여 지워야 한다. 현재까지 이로인한 문제점은 없은 것으로 판단된다.
AVISynth Script
다음 Link에서 긁어 온 것이다. http://www.afterdawn.com/guides/archive/using_avisynth_page_4.cfm If you're familiar with any kind of scripting you should catch on to AviSynth right away. If not, it should be only slightly more difficult. Like pretty much any type of script, an AviSynth script is basically a list of instructions. The instructions range from opening a video file to changing the resolution, and even converting from PAL to NTSC. Scripts are stored in text files that end with an extension of .AVS. There are specialized tools for script editing that will create files with this extension for you. Otherwise you can use a general purpose text editor (like Notepad) and change the extension to .AVS when you save it.
###Script Reading 101 Before you try to write an AviSynth script, it's helpful to learn how to read them first. This will give you a taste of the syntax (computer grammar) and general flow of a script. In fact we're not even going to start with a script that would work in AviSynth because we aren't interested in what it does yet. For now we'll just concentrate on how it's written. This example, and in fact the entire guide, is intended to be a basic introduction to AviSynth. There are much more complex things that can be done with AviSynth that won't be covered here.
###Basic Script
xxxxxxxxxx421# Lines that start with the # character aren't parsed by AviSynth.2# Instead they're used for human readable comments. These can3# include instructions for using the script, explanations of4# specific elements, writing credits, legal notices, or just neat5# designs6#7#########################################8#***************************************#9#********** Sample Script 1.0 **********#10#******* By Rich Fiscus (Vurbal) *******#11#********* © 2007 Afterdawn.com ********#12#***************************************#13#########################################14#15# Load a third party plugin16# Not necessary for plugins stored in the AviSynth plugins folder17# Located at C:\Program Files\AviSynth 2.5\plugins18LoadPlugin("D:\Plugins\pluginName.dll")19# Load muxed video/audio source20MuxedSource("Muxed Filename.ext")21# Load separate video and audio sources22# Uncomment the code in this section23# To combine video and audio from separate files24#25# Load Video Source26# Vid=VideoSource("D:\Folder Name\Video Filename.ext")27#28# Load audio source29# Aud=AudioSource("D:\Folder Name\Audio Filename.ext")30#31# Combine Video and Audio32# AudioDub(Vid, Aud)33# Load a second video/audio combination34# Uncomment the code in this section35# To combine video and audio from separate files without variables36#37# clipOne=AudioDub(VideoSourceFilter("D:\Folder Name\Video Filename.ext"), /38# AudioSourceFilter("D:\Folder Name\Audio Filename.ext"))39# Do Something40SomeFilter(SomeArg="something", OtherArg=3, BoolArg=true)41# Concatenate Filters42SomeFilter().SomeOtherFilter()
자세한 내용은 해당 사이트를 참조하자.
ffmpeg을 사용한 Image to YUV 등
다음 사이트를 참조하자 https://en.wikibooks.org/wiki/FFMPEG_An_Intermediate_Guide/image_sequence 간단히 다음과 같이 하면 된다. 중요한 것은 Start_Number 이것이 지정되지 않으면 0 부터 시작하는데, 폴더에 0 부터 시작하는 파일 이름이 없으면 file을 찾지 못한다.
xxxxxxxxxx11ffmpeg -start_number 002400 -i h:\HDRContents\QT-4036_Colors_709\QT-4036_Colors_709_%06d.tif -vcodec rawvideo -pix_fmt yuv420p10le QT-4036_Colors_709.yuv
당연하지만, 배치파일에서 부르게 될 경우에는 % 기호 앞에 %를 하나 더 붙여주어야 한다.
ffmpeg / DASH
다음 사이트를 참조한다. http://wiki.webmproject.org/adaptive-streaming/instructions-to-playback-adaptive-webm-using-dash
ffmpeg / AVISynth
ffmpeg으로 만들어진 임의의 파일을 AVISynth 에서 읽어들이고자 할때
- FFmpegSource2 를 사용한 방법
- LSMASHSource 를 사용한 방법 2번의 방법은 LSMASHSource.dll avcodec.dll, avformats.dll 이 모두 Plugins 폴더에 있어야 하며 이를 Loadplugin을 통해 읽어들여서 사용하는 방식이다.
AVISynth 동영상 편집과 관련된 거의 모든 부분
xxxxxxxxxx601#========================================================================================2# Annual Report3# AVISynth를 사용한 여러가지 테크닉을 사용한다.4# 2016 02 095#========================================================================================6LoadPlugin("c:\Program Files (x86)\AviSynth\plugins\LSMASHSource.dll")7#Clip_A = FFmpegSource2("AOA_miniskirt_ETRI_QP20.bin", vtrack=-1, atrack=-2, cache=True, cachefile="", fpsnum=-1, fpsden=1, threads=-1, timecodes="", seekmode=1, overwrite=False, width=-1, height=-1, resizer="BICUBIC", colorspace="", rffmode=0, adjustdelay=-1, utf8=False, varprefix="")8#Clip_A = Trim(Clip_A, 449, 1157)9#Clip_B = FFmpegSource2("AOA_MiniSkirt_3m17s_UHD_11864_18Mbps.x265", vtrack=-1, atrack=-2, cache=True, cachefile="", fpsnum=-1, fpsden=1, threads=-1, timecodes="", seekmode=1, overwrite=False, width=-1, height=-1, resizer="BICUBIC", colorspace="", rffmode=0, adjustdelay=-1, utf8=False, varprefix="")10#Clip_B = Trim(Clip_B, 450, 1158)1112Clip_O = LSMASHVideoSource("Orig_v210.mov", track=0, threads=0, seek_mode=0, seek_threshold=10, dr=False, stacked=False, format="YUV420P8")13Clip_A = LSMASHVideoSource("A_Edit.mov", track=0, threads=0, seek_mode=0, seek_threshold=10, dr=False, stacked=False, format="YUV420P8")14Clip_B = LSMASHVideoSource("B_Edit.mov", track=0, threads=0, seek_mode=0, seek_threshold=10, dr=False, stacked=False, format="YUV420P8")1516Clip_A = Subtitle(Clip_A, "ETRI HEVC Encoder ", first_frame=30, last_frame=329, font="Arial", size=120, text_color=$FFFF00, halo_color=$000000, align=2, spc=0, font_width=0, font_angle=0.0, interlaced=False)17Clip_B = Subtitle(Clip_B, "Open Source (x265)", first_frame=30, last_frame=329, font="Arial", size=120, text_color=$FFFF00, halo_color=$000000, align=2, spc=0, font_width=0, font_angle=0.0, interlaced=False)18Clip_AO = Compare(Clip_A, Clip_O, channels="YUV", show_graph=false)19Clip_BO = Compare(Clip_B, Clip_O, channels="YUV", show_graph=false)20Clip_AOCrop = Crop(Clip_AO, 0, 0, 1920, 2160, align=False)21Clip_BOCrop = Crop(Clip_BO, 0, 0, 1920, 2160, align=False)22Clip_Out = StackHorizontal(Clip_AOCrop, Clip_BOCrop)23#Clip_A = Info(Clip_A)24#Clip_A = FFInfo(Clip_A, framenum=True, frametype=True, cfrtime=True, vfrtime=True, varprefix=FFVAR_PREFIX)25#Clip_Out = Clip_AOCrop26Clip_A0 = Trim(Clip_A,0, 29)27Clip_A1 = Trim(Clip_A, 30, 179)28Clip_B1 = Trim(Clip_B, 180, 329)29Clip_A2 = Trim(Clip_A, 330, 611)30Clip_B2 = Trim(Clip_B, 330, 611)31Clip_A2SH = Crop(Clip_A2, 0, 0, 1920, 2160, align=False)32Clip_B2SH = Crop(Clip_B2, 0, 0, 1920, 2160, align=False)33Clip_A2SH = Subtitle(Clip_A2SH, "ETRI HEVC Encoder ", first_frame=0, last_frame=282, font="Arial", size=120, text_color=$FFFF00, halo_color=$000000, align=2, spc=0, font_width=0, font_angle=0.0, interlaced=False)34Clip_B2SH = Subtitle(Clip_B2SH, "Open Source (x265)", first_frame=0, last_frame=282, font="Arial", size=120, text_color=$FFFF00, halo_color=$000000, align=2, spc=0, font_width=0, font_angle=0.0, interlaced=False)35Clip_SHout = StackHorizontal(Clip_A2SH, Clip_B2SH)36Clip_4K = Clip_A0 + Clip_A1 + Clip_B1 + Clip_SHout37Clip_Pre = LanczosResize(Clip_4K, 1280, 720, src_left=0, src_top=0, src_width=0, src_height=0, taps=3)38Clip_AO = Clip_AO.Trim(612, Clip_AO.framecount-1)39Clip_BO = Clip_BO.Trim(612, Clip_BO.framecount-1)40Clip_AOCrop = Crop(Clip_AO, 0, 0, 640,720, align=false)41Clip_BOCrop = Crop(Clip_BO, 0, 0, 640,720, align=false)42Clip_AOCrop = Subtitle(Clip_AOCrop, "ETRI HEVC Encoder ", first_frame=0, last_frame=Clip_AOCrop.framecount-1, font="Arial", size=40, text_color=$FFFF00, halo_color=$000000, align=2, spc=0, font_width=0, font_angle=0.0, interlaced=False)43Clip_BOCrop = Subtitle(Clip_BOCrop, "Open Source (x265) ", first_frame=0, last_frame=Clip_BOCrop.framecount-1, font="Arial", size=40, text_color=$FFFF00, halo_color=$000000, align=2, spc=0, font_width=0, font_angle=0.0, interlaced=False)44Clip_ABOSH = StackHorizontal(Clip_AOCrop, Clip_BOCrop)45Clip_SP = Trim(Clip_ABOSH, 11, 11)46Clip_ABOSH_Pre = Trim(Clip_ABOSH, 0, 10)47Clip_SP = Clip_SP + Clip_SP + Clip_SP+ Clip_SP+ Clip_SP+ Clip_SP+ Clip_SP + Clip_SP48Clip_SP = Clip_SP + Clip_SP + Clip_SP+ Clip_SP+ Clip_SP+ Clip_SP+ Clip_SP + Clip_SP49CircleP = ImageSource("Circle.png", pixel_type="RGB32")50PSNRA = ImageSource("PSNR_A.png", pixel_type="RGB32")51PSNRB = ImageSource("PSNR_B.png", pixel_type="RGB32")52CircleP2 = CircleP53Clip_SP = Overlay(Clip_SP, CircleP, x=0, y=320, mask= showalpha(CircleP), opacity=1.0, mode="blend", greymask=true, ignore_conditional=false, pc_range=false)54Clip_SP = Overlay(Clip_SP, CircleP2, x=640, y=320, mask= showalpha(CircleP2), opacity=1.0, mode="blend", greymask=true, ignore_conditional=false, pc_range=false)55Clip_SP1 = Clip_SP56Clip_SP = Overlay(Clip_SP, PSNRA, x=0, y=120, mask= showalpha(PSNRA), opacity=1.0, mode="blend", greymask=true, ignore_conditional=false, pc_range=false)57Clip_SP = Overlay(Clip_SP, PSNRB, x=640, y=120, mask= showalpha(PSNRB), opacity=1.0, mode="blend", greymask=true, ignore_conditional=false, pc_range=false)58Clip_SP2 = Clip_SP59Clip_Out = Clip_Pre + Clip_ABOSH_Pre + Clip_SP1 + Clip_SP260return Clip_Out
ffmpeg / Lossless H.264 Encoding
다음과 같이 하면 기본적인 Lossless H.264 인코딩이 수행된다. 즉, -qp 0 혹은 -crf 0 로 세팅하면 Lossless H.264가 수행되며 -crf 보다 -qp가 더 확실하다. ** Lossless Example (fastest encoding)**
xxxxxxxxxx11ffmpeg -i input -c:v libx264 -preset ultrafast -qp 0 output.mkv
** Lossless Example (best compression) **
xxxxxxxxxx11ffmpeg -i input -c:v libx264 -preset veryslow -qp 0 output.mkv
ffmpeg의 H.264 Encoding 관련 옵션은 다음 사이트를 참조로 한다. https://trac.ffmpeg.org/wiki/Encode/H.264
ffmpeg/xvid Lossless
xvid의 경우 Lossless 하게 만들 수는 없다 단지 q:v 값이 2일때가 가장 낮은 q 값이므로 여기에 맞추는 것이 좋다.
xxxxxxxxxx11ffmpeg32 -i AnnualReport02.avs -c:v libxvid -q:v 2 -r 15 -f avi AnnualReport02.avi
그러나 이 경우에는 PPT에 AVI 파일이 들어가지 않는다. 제대로 디코딩 되지 않는다는 단점이 있다. PPT에 삽입하기 위해서는 MPEG4로 인코딩 하여야 한다. (xvid, msmpeg4 등)
AVISynth 사용시 발생하는 문제점
64비트 Windows 7에서는 간간히 다음의 DLL이 없다는 메시지가 ffmpeg과 AVISynth script 를 사용하여 인코딩을 하면 나타난다. avresample-3.dll MSVCR71.dll
Bitnami Redmine Subversion Server 운용법
무척 간단하다. 먼저 C:\Bitnami\redmineplusagile-3.2.0-3\subversion\scripts 폴더를 연다. 여기서 serviceinstall.bat 를 연다. 그러면 다음과 같이 되어 있다.
xxxxxxxxxx121@echo off2rem -- Check if argument is INSTALL or REMOVE3if not ""%1"" == ""INSTALL"" goto remove4"C:\Bitnami\redmineplusagile-3.2.0-3/subversion\scripts\winserv.exe" install redmineplusagileSubversion -displayname "redmineplusagileSubversion" -start auto "C:\Bitnami\redmineplusagile-3.2.0-3/subversion\bin\svnserve.exe" -d --listen-port=3690 5net start redmineplusagileSubversion >NUL6goto end7:remove8rem -- STOP SERVICES BEFORE REMOVING9net stop redmineplusagileSubversion >NUL10"C:\Bitnami\redmineplusagile-3.2.0-3/subversion\scripts\winserv.exe" uninstall redmineplusagileSubversion11:end12exit여기에 "C:\Users\Admin\SVN_Repository" 에 Subversion Repository를 만든다고 가정하자. 이 디렉토리는 Windows 7 라이브러리의 Subversion 라이브러리에 폴더를 만들 경우 생기는 경로이다. 이 안에 Project들을 올리게 되면 각 Project 마다 저장소 Repository들이 만들어진다. 따라서 이를 위 batch 파일에 추가해 준다. INTALL 부분의 맨 마지막에 -r "C:\Users\Admin\SVN_Repository" 부분이다.
xxxxxxxxxx121@echo off2rem -- Check if argument is INSTALL or REMOVE3if not ""%1"" == ""INSTALL"" goto remove4"C:\Bitnami\redmineplusagile-3.2.0-3/subversion\scripts\winserv.exe" install redmineplusagileSubversion -displayname "redmineplusagileSubversion" -start auto "C:\Bitnami\redmineplusagile-3.2.0-3/subversion\bin\svnserve.exe" -d --listen-port=3690 -r "C:\Users\Admin\SVN_Repository"5net start redmineplusagileSubversion >NUL6goto end7:remove8rem -- STOP SERVICES BEFORE REMOVING9net stop redmineplusagileSubversion >NUL10"C:\Bitnami\redmineplusagile-3.2.0-3/subversion\scripts\winserv.exe" uninstall redmineplusagileSubversion11:end12exit이렇게 한 다음 Bitnami Management에서 모든 서비스를 껐따 켠다. Bitnami redmine Subversion은 기본적으로 방화벽에 막혀 있으므로 C:\Bitnami\redmineplusagile-3.2.0-3\subversion\bin\svnserve 의 방화벽을 해제하도록 한다. "C:\Users\Admin\SVN_Repository" 에
xxxxxxxxxx11svnadmin create test
이렇게 Repository를 만들면 된다. 그리고 해당 Repository는 svn://localhost/test 혹은 svn://ip/test 등으로 Checkout 하여 확인하면 된다.
SSH , wget, ftp 사용법등
다음 사이트가 매우 유용하다. http://devanix.tistory.com/255
ftp 사용법
Windows 서버에 있는 고유 ftp 명령을 사용하여 put을 하도록 한다. 일단 방화벽을 Server와 Client 모두 확인해야 한다.
ftp 를 파일을 사용하여 작동시키는 방법
다음과 같이 하는 것이 기본이다.
xxxxxxxxxx11ftp -n -v -s:ftpSet.txt
그런데, 이 경우에는 ftpSet.txt 에 Put이나 Get을 넣을 경우 해당 명령어 까지 모두 넣어야 하므로 File이름을 적시해야 한다. 그러나 텍스트 파일이므로 자동적으로 만들 수가 없다. 이 경우에는 Batch 파일에서 echo 명령어를 통해 ftpSet.txt를 새로 만드는 방식으로 대응해야 한다. 따라서 다음과 같은 부분을 배치파일에 추가하여야 한다.
xxxxxxxxxx101:MakeFtpSetupFile2SET FTPSETUP=ftpSet.txt /* 배치파일 이름 지정 */3echo. >%FTPSETUP% /* 기존에 해당 파일이 있으면 한 줄을 새로 넣으면서 기존 내용을 다 지운다. */4echo open 129.254.64.144 >>%FTPSETUP% /* ftp 서버 연결 : Remote PC 연결 */5echo user sderoen sj1612 >>%FTPSETUP% /* ID 와 Password : ftp의 USER 명령 사용 */6echo bin >>%FTPSETUP% /* ftp Binary Mode */7echo hash >>%FTPSETUP% /* ftp HASH */8echo cd Haswell76 >>%FTPSETUP% /* ftp Remote 측 Directory 변경 */9echo put %ResultFile% >>%FTPSETUP% /* 결과 파일을 환경변수로 만들어서 보낸다 */10echo bye >>%FTPSETUP% /* ftp 끝내기 */
wget 사용법
ftp 서버에 연결하는 방법이다.
xxxxxxxxxx11wget --ftp-user=sderoen --ftp-password=sj1612 ftp://129.254.64.144/Work_144/TestHEVC.bat
SSH
SSH server는 BitViseSSH 서버가 깔끔한 SSH 인터페이스를 제공한다. 이것을 사용하자. (한글도 깨지지 않고 정상적으로 잘 보임)
SSH Client for Windows commandline
OpenSSH 를 사용하면 된다. 이를 사용하면 간단하게 Commandline에서 SSH 클라이언트와 서버를 운용할 수 있다. 그러나 SSH 서버는 위에서 말했듯이 BitViseSSH가 좋다.
SSH에 Password 를 포함하여 실행
ssh를 사용한 프로그램 실행은 간단하다. 다음과 같다.
xxxxxxxxxx51for v in {1..1}2do3echo "Starting Worker on 172.31.${v}.1"4ssh root@172.31.${v}.1 "./run.w"5done
password를 넣는 경우는
PowerPoint에 추가 기능 넣기
먼저 다음 사이트를 클릭한다. PowerPoint용 좋은 Add-in 들이 있다.
http://skp.mvps.org/liveweb.htm
여기서는 liveweb 이라는 Add-in을 설치하는 법을 알아본다.
Powerpoint 에서 정보->옵션->추가기능 을 선택한다.
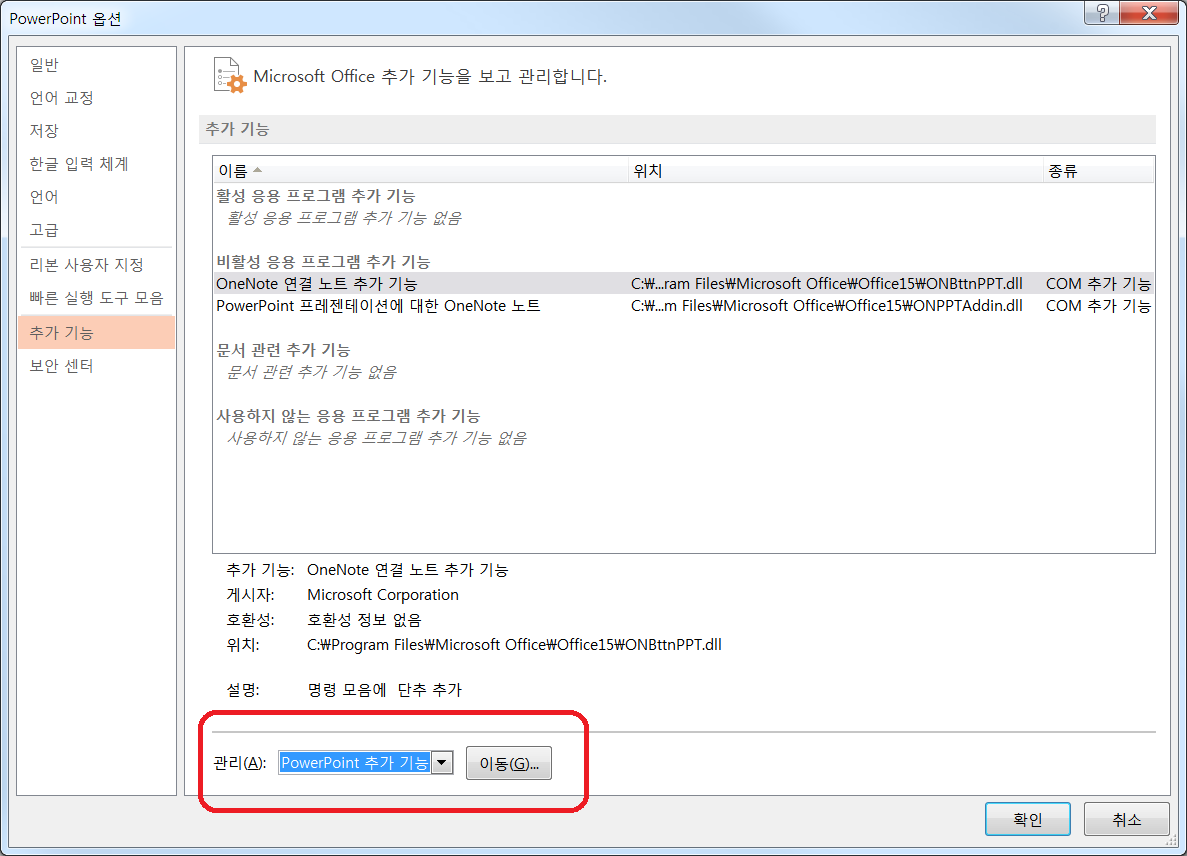 이동을 누르면 다음과 같이 추가 기능이 나온다.
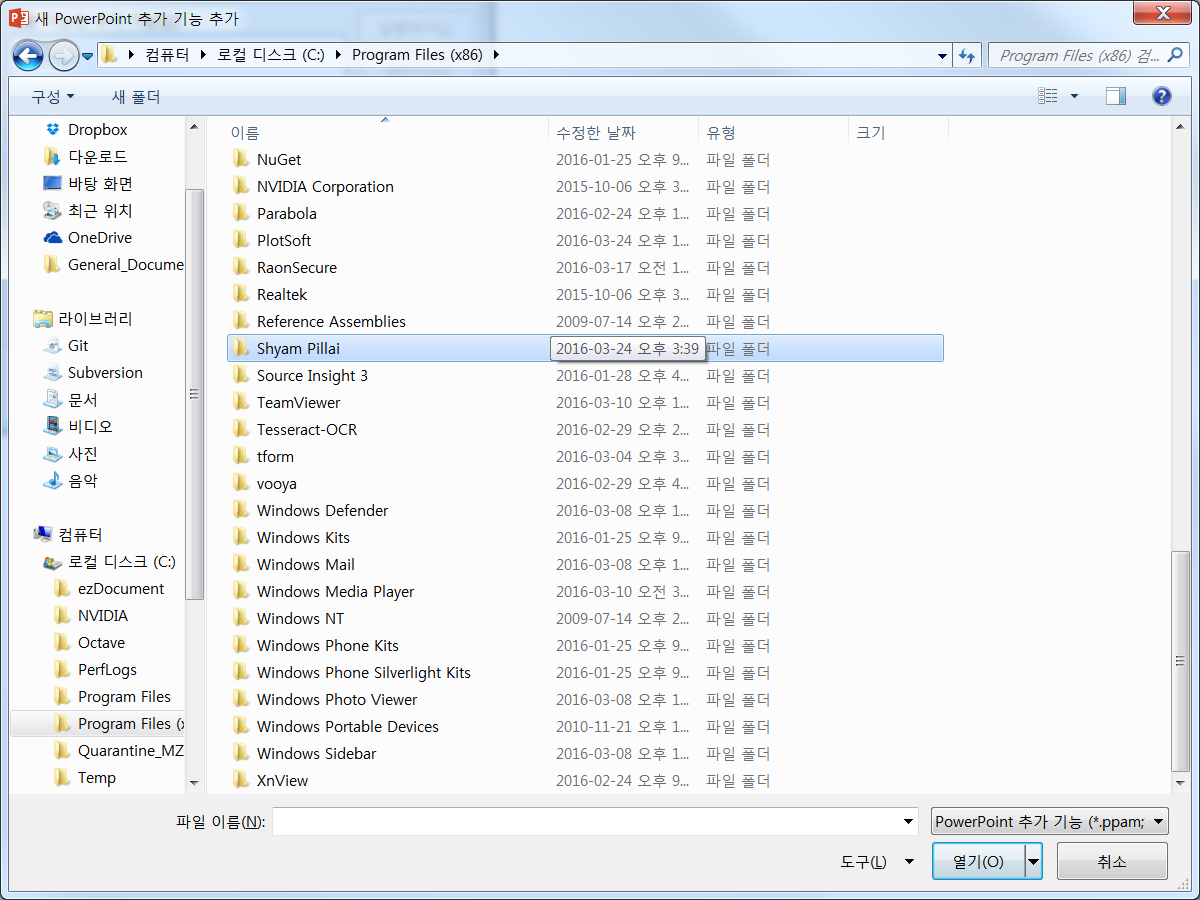
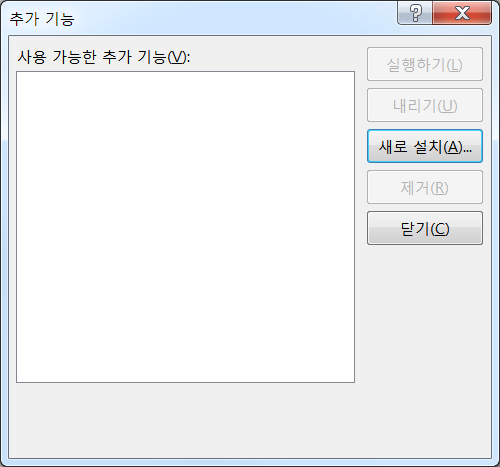 새로설치를 눌러서 Shyam Pillai 폴더 -> Live Web -> LiveWeb.ppam 을 선택한다.
 선택하면 다음 그림과 같이 된다.
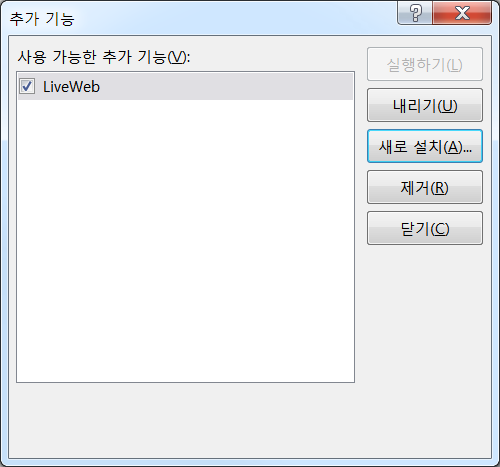 정상적으로 설치가되면 [삽입] 리본메뉴의 맨 우측에 Web Page 아이콘이 생기며, [추가기능]이라는 리본메뉴도 새롭게 생겨나게 된다.

ffmpeg / AAC Audio를 포함하는 경우 MP4 다중화
다음과 같이 2개의 HEVC ES 와 aac ES가 있을 때 ffmpeg으로 MP4로 다중화 하는 방법은 다음과 같다.
xxxxxxxxxx11ffmpeg -r 59.94 -i AOA_MiniSkirt_3m17s_FHD_5994.265 -i AOA_MiniSkirt_3m17s_UHD_5994.aac -map 0:0 -map 1:0 -c:v copy -c:a copy -bsf:a aac_adtstoasc -r 59.94 -f mp4 AOA_MiniSkirt_3m17s_FHD_5994_Q2426.mp4
Subversion Command Line 사용법
SSH 등을 사용하여 Teamviewer 를 사용하지 않고 root-PC 서버에 접속 하였을 때, 콘솔 창에서 Subversion 을 수행할 수 있다. 이때 기본적인 SVN 명령어 수행방법을 살펴본다.
- help 중요한 명령어들의 사용법은 다음과 같이 알아보면 된다. 예를 들어 Update 명령어의 경우는 다음과 같이 하면 된다.
xxxxxxxxxx11svn help update
- Update 만일 해당 폴더에 위치하고 있는 경우는 다음과 같이 하면 된다. SVN 폴더가 ** C:\Bitnami\redmine-2.6.5-0\apache2\htdocs\docs ** 인 경우 SVN 서버 위치를 알고 있으므로
xxxxxxxxxx11C:\Bitnami\redmine-2.6.5-0\apache2\htdocs\docs>svn --username sderoen --password sj1612 update .\
- Checkout
xxxxxxxxxx21svn checkout 저장소URL [PATH...]2svn --username sderoen --password sj1612 checkout https://jnwhome.iptime.org:8443/svn/General_Document/trunk
- Commit
xxxxxxxxxx11svn commit [PATH...]
이것 외의 기본적인 내용들은 다음 사이트를 참고하거나 구글에서 알아보도록 한다. http://starplaying.tistory.com/460
Windows BatchFile 사용법
다음 링크에 거의 모든 것이 정리되어 있다. http://mssp.tistory.com/entry/%EB%B0%B0%EC%B9%98%ED%8C%8C%EC%9D%BC-%EB%AA%85%EB%A0%B9%EC%96%B4
ffmpeg : Frame 단위로 Contents 자르기
예를 들어 다음과 같이 Start Frame과 Final Frame을 찾았다고 가정하자. (AVISynth를 사용하여 찾을 수 있다)
| Seq No. | Start | Final |
|---|---|---|
| 0 | 0 | 225 |
| 1 | 226 | 465 |
| 2 | 466 | 650 |
| 3 | 651 | 1052 |
| 4 | 1053 | 1542 |
| 5 | 1543 | 2408 |
ffmpeg 에서는 두 가지 방법을 제공하는데, (다음의 페이지를 참고한다. https://trac.ffmpeg.org/wiki/Seeking) 안정성이 높은 방법은 다음의 방법이다.
xxxxxxxxxx11ffmpeg -ss 시작시간 -i 입력파일 -frames:v 비디오 프레임 수 -c:v copy -c:a copy -f 파일포맷 출력파일
이때 시작 시간은 다음과 같이 계산하여야 한다.
xxxxxxxxxx11= CEILING.MATH( ((이전 Seq 마지막 프레임 * 1001/60000) * 1000 + 1 ))/1000
1001/60000 dms 59.94 프레임 때문에 그런 것이다. 1을 더한 것은 확실하게 이전 Seq 마지막 프레임을 넘어가도록 만들기 위함이다. 즉, 2번쨰 Sequence를 예를 들면 이전 Seq 마지막 프레임은 225 이므로 225를 대임하여 계산하게 되면 현재 Seq. 의 시작 시간을 확실하게 지정할 수 있다.
여기에
xxxxxxxxxx11-frames:v 비디오 프레임 수
는 465 - 225 를 하거나 465 - 226 + 1을 하여 계산하면 된다. 즉,
xxxxxxxxxx21비디오 프레임 수 = Final - Start + 1 or2비디오 프레임 수 = Final - 이전 Seq Final
이다.
이렇게 하면 ProRes 혹은 여러가지 원본 파일을 ffmpeg을 사용하여 정확하게 끊어낼 수 있다. 당연히 Batch 파일을 사용하면 된다.
Transcoder System 에서 TS 만드는 방법
간단하다. 다음과 같이 하면 된다.
xxxxxxxxxx11StreamMuxer64.exe UserConfig.ini TsMuxer.ini Output.ini
이렇게 하면 UserConfig.ini, TSMuxer.ini, Output.ini 에 있는 데이터 대로 TS Muxing 이 된다.
ffmpeg 의 프로그래밍
디렉토리 구조
디렉토리 구조가 매우 중요하다. 예를 들어 .\FFMPEG_TEST 라는 디렉토리에 Visual C++ 프로젝트를 만들면 SLN 디렉토리 밑에 FFMPEG_TEST 디렉토리가 더 생기고 이 밑에 FFMPEG의 Include, Lib 폴더를 복사한다.
Project Property
C/C++
General->Additional Include Directory 에서 에서 .\include 를 추가한다.
Linker
Additional Library Directory 에서 .\lib 추가한다.
DLLS
ffmpeg API를 사용할 시, 필요한 DLL 을 출력 EXE 파일에 추가한다.
| API | DLL |
|---|---|
| av_log | avutil-55.dll |
| av_register_all | avcodec-57.dll, avformat-57.dll, swresample-2.dll |
등등..
av_Log 사용법
printf, fprintf 대신, FFMPEG에서 제공하는 IO 함수이다.
xxxxxxxxxx11av_log(NULL, AV_LOG_INFO, "Hello ffmpeg \n");
Multimedia FIle을 열고 닫는 법
다음 코드를 보자.
xxxxxxxxxx101 const char *szFilePath = "AOA_miniskirt_ETRI_QP20.mp4";23 ///> Initialize libavformat and register all the muxers, demuxers and protocols.4 av_register_all();56 ///> Initialize libavcodec and register all the codecs.7 avcodec_register_all();89 ///> Do global initialization of network components.10 avformat_network_init();이 코드는 ffmpeg Library들을 초기화 하는 부분이다. 각각 Format, Muxer/Demuxer, Codec, Network을 초기화 하는 부분이다.
xxxxxxxxxx21 int ret;2 AVFormatContext *pFmtCtx = NULL;File은 먼저 AVFormatContext 구조체로 가져와야 한다. Multimedia 파일의 각종 정보가 이 안에 모두 저장된다.
avformat_open_input Multimedia Input 데이터를 가져온다.
xxxxxxxxxx71 ///> Open an input stream and read the header.2 ret = avformat_open_input(&pFmtCtx, szFilePath, NULL, NULL);3 if (ret != 0) {4 av_log(NULL, AV_LOG_ERROR, "File [%s] Open Fail (ret: %d)\n", szFilePath, ret);5 exit(-1);6 }7 av_log(NULL, AV_LOG_INFO, "File [%s] Open Success\n", szFilePath);avformat_find_stream_info Multimedia 파일의 Stream에 대한 정보를 가져온다.
xxxxxxxxxx71 ///> Read of a media file to get stream information2 ret = avformat_find_stream_info(pFmtCtx, NULL);3 if (ret < 0) {4 av_log(NULL, AV_LOG_ERROR, "Fail to get Stream Information\n");5 exit(-1);6 }7 av_log(NULL, AV_LOG_INFO, "Get Stream Information Success\n");pFmtCtx->streams 에서 start_time, info, first_dts, cur_dts, codec_info_nb_frames, parser, start_time, bit_rate 등이 바뀐다.
마무리 부분
xxxxxxxxxx51 ///> Close an opened input AVFormatContext. 2 avformat_close_input(&pFmtCtx);34 ///> Undo the initialization done by avformat_network_init.5 avformat_network_deinit();Media File의 디코딩
다음 페이지를 참조한다. Reference
Find Video and Audio Stream in Media
Media File에서 비디오 스트림과 오디오 스트림의 Index를 찾는다. av_find_best_stream API는 가장 처음 나타나는 비디오 스트림과 오디오 스트림을 찾아준다. AVMEDIA_TYPE_VIDEO, AVMEDIA_TYPE_AUDIO 구조체는 ffmpeg Document를 참조한다.
xxxxxxxxxx161 /*2 -------------------------------------------------------3 Find Video and Audio Stream in Media4 -------------------------------------------------------5 */67 int nVSI = -1; ///> Video Stream Index8 int nASI = -1; ///> Audio Stream Index910 ///> 비디오 스트림 찾기11 nVSI = av_find_best_stream(pFmtCtx, AVMEDIA_TYPE_VIDEO, -1, -1, NULL, 0);12 ///> 오디오 스트림 찾기 (비디오 스트림 있다면 연관된)13 nASI = av_find_best_stream(pFmtCtx, AVMEDIA_TYPE_AUDIO, -1, nVSI, NULL, 0);1415 av_log(NULL, AV_LOG_INFO, "Video Index : %2d \n", nVSI);16 av_log(NULL, AV_LOG_INFO, "Audio Index : %2d \n", nASI);Find Video and Audio Codec in Media
avcodec_find_decoder API를 사용하여 비디오 및 오디오 코덱을 찾아낸다. 해당 코덱의 특성 구조체는 AVCodec 이며 이 특성 구조체를 사용하여 디코딩을 위한 코덱을 호출할 수 있다.
xxxxxxxxxx311 /*2 -------------------------------------------------------3 Find Video and Audio Codec in Media4 -------------------------------------------------------5 */67 ///> Find Video Decoder8 AVCodec *pVideoCodec = avcodec_find_decoder(9 pFmtCtx->streams[nVSI]->codec->codec_id10 );1112 if (pVideoCodec == NULL) {13 av_log(NULL, AV_LOG_ERROR, "No Decoder was Found\n");14 exit(-1);15 }16 else{17 av_log(NULL, AV_LOG_INFO, "Video Codec : %s\n", pVideoCodec->long_name);18 }19 20 ///> Find Audio Decoder21 AVCodec *pAudioCodec = avcodec_find_decoder(22 pFmtCtx->streams[nASI]->codec->codec_id23 );2425 if (pAudioCodec == NULL) {26 av_log(NULL, AV_LOG_ERROR, "No Decoder was Found\n");27 exit(-1);28 }29 else{30 av_log(NULL, AV_LOG_INFO, "Video Codec : %s\n", pAudioCodec->long_name);31 }Initilize Codec Context
앞에서 찾아진 코덱 Context를 초기화 시켜야 한다. 즉, Codec DLL을 로딩하고 Open 한다. API는 avcodec_open2 이다.
xxxxxxxxxx301 /*2 -------------------------------------------------------3 Initilize Codec Context4 -------------------------------------------------------5 */6 int iRet = -1;7 8 ///> Initialize Video Codec Context as Decoder9 iRet = avcodec_open2(pFmtCtx->streams[nVSI]->codec, pVideoCodec, NULL);1011 if (iRet < 0) {12 av_log(NULL, AV_LOG_ERROR, "Fail to Initialize Video Decoder\n");13 exit(-1);14 }15 else16 {17 av_log(NULL, AV_LOG_INFO, "Initialize Video Decoder\n");18 }1920 ///> Initialize Audio Codec Context as Decoder21 iRet = avcodec_open2(pFmtCtx->streams[nASI]->codec, pAudioCodec, NULL);2223 if (iRet < 0) {24 av_log(NULL, AV_LOG_ERROR, "Fail to Initialize Audio Decoder\n");25 exit(-1);26 }27 else28 {29 av_log(NULL, AV_LOG_INFO, "Initialize Audio Decoder\n");30 }Decoding
Decoding 과정은 조금 복잡하기 때문에 몇 단계로 나누어서 설명한다. 기본은 AVCodecContext 구조체를 가져와서 이를 적절한 Decoder 함수의 코덱 인자로 넘겨준다. 디코딩할 데이터는 Media (AVFormat Context)에서 Packet단위로 읽어온다 (AVPacket) 디코딩된 데이터는 AVFrame 구조체에 데이터와 특성이 저장된다.
Definitions
AVCodecContext, AVPacket, AVFrame 구조체를 가져와야 한다. nVSI, nASI 는 위에서 찾은 Audio, Video Stream Index 이다.
xxxxxxxxxx61 AVCodecContext *pVCtx = pFmtCtx->streams[nVSI]->codec;2 AVCodecContext *pACtx = pFmtCtx->streams[nASI]->codec;34 AVPacket packet;5 AVFrame *pVFrame = av_frame_alloc(); /// old Function : avcodec_alloc_frame();6 AVFrame *pAFrame = av_frame_alloc(); Processing
예제는 디코딩을 수행한 후, 디코딩된 비디오 영상중 하나의 프레임을 File로 떨어뜨리는 것이다.
- av_read_frame 으로 비디오 혹은 오디오 1 프레임을 읽는다. 이는 AVPacket으로 저장된다.
- packet.stream_index 가 Video 일때와 Audio 일때를 따로 처리한다.
- avcodec_decode_video2 를 통해 Video 1 프레임을 디코딩 한다.
- avcodec_decode_audio4 를 통해 Audio 1 프레임을 디코딩 한다.
- Subtitle은 ** avcodec_decode_subtitle2 ** 를 사용ㅇ한다.
xxxxxxxxxx711 int bGotPicture = 0;2 int bGotSound = 0;34 ///> For Debugging5 bool bFirstVideoFrame = true;6 bool bFirstAudioFrame = true;7 unsigned long ulnVFrame = 0;8 unsigned long ulnAFrame = 0;9 int DataSizeforY = 0, DataSizeforU = 0, DataSizeforV = 0;1011 while (av_read_frame(pFmtCtx, &packet) >= 0) {12 if (packet.stream_index == nVSI) {13 // Decode Video14 avcodec_decode_video2(pVCtx, pVFrame, &bGotPicture, &packet);15 if (bGotPicture) {16 // Ready to Render Image17 18 //Video Information19 if (bFirstVideoFrame){20 DataSizeforY = pVFrame->linesize[0] * pVFrame->height;21 DataSizeforU = pVFrame->linesize[1] * pVFrame->height/2;22 DataSizeforV = pVFrame->linesize[2] * pVFrame->height/2;23 24 bFirstVideoFrame = false;25 }26 27 // Processing28 if (ulnVFrame == 516){2930 FILE *Fp = NULL;31 Fp = fopen("Test_YUV.yuv", "wb");32 fwrite(pVFrame->data[0], 1, DataSizeforY, Fp);33 fwrite(pVFrame->data[1], 1, DataSizeforU, Fp);34 fwrite(pVFrame->data[2], 1, DataSizeforV, Fp);3536 fclose(Fp);37 }3839 // Final Substage40 ulnVFrame++;41 }42 }43 44 45 46 else if (packet.stream_index == nASI) {47 // Decode Audio48 avcodec_decode_audio4(pACtx, pAFrame, &bGotSound, &packet);49 if (bGotSound) {50 // Ready to Render Sound5152 if (bFirstAudioFrame){53 54 //To do Any Thing55 56 bFirstAudioFrame = false;57 }58 ulnAFrame++;59 }60 }6162 //Print Dynamic Information63 av_log(NULL, AV_LOG_INFO, "CTS : %d PTS: %d Video Frames: %d Audio Frames : %d \r",64 pVFrame->coded_picture_number, pVFrame->display_picture_number, ulnVFrame, ulnAFrame);6566 // Free the packet that was allocated by av_read_frame67 av_free_packet(&packet);68 }6970 av_free(pVFrame);71 av_free(pAFrame);Transcoder System 에서 TS 만드는 방법 [2]
** E:[091]_Contents_Work\File_Transcoder ** 에 파일 Transcoder가 있다.
혹은 더욱 최신으로
** E:[091]_Contents_Work\FileTsMuxer_v1.2\bin ** 를 사용하면 된다.
여기에서 start.bat를 실행하면 된다. 비디오 파일은 video.265, 오디오는 audio.aac 로 하면 되며... TSMux.ini 를 손보는 방식으로 Muxing 시 입력 파일을 지정할 수 있다.
Audio 가 없는 경우 TestMode=0 MediaType=2
Audio만 가지고 TS TestMode=1 MediaType=0
그런데, 문제가 있으므로 그냥 Audio가 없는 경우 TestMode=1 MediaType=0 으로 하고 TS 만들되 Audio_null.aac 라는 크기 0인 aac 파일을 사용해도 된다.
비트레이트 변경 방법
TSMux.ini 에 있는 비트레이트만 변경해서는 안된다. 반드시 UserConfig.ini에 있는 비트레이트도 변경 시켜야 한다. 또한 프레임 레이크도 변경 시켜야 한다.관계는 다음과 같다.
비트레이트 : 프레임 레이트 :
ffmpeg MP4 에서 HEVC ES extract 방법
xxxxxxxxxx11ffmpeg -i paonan1.mp4 -c:v copy -bsf hevc_mp4toannexb paonan1.hevc
ffmpeg Video Slide Show
http://trac.ffmpeg.org/wiki/Create%20a%20video%20slideshow%20from%20images
ffmpeg 의 프로그래밍 [2]
인코딩
인코딩 준비
xxxxxxxxxx111 /*2 -------------------------------------------------------3 encoding4 -------------------------------------------------------5 */67 AVCodec *enc;8 AVCodecContext *enc_ctx = NULL;9 AVPacket outpkt;1011 int got_output = 0;인코딩 parameter 세팅
xxxxxxxxxx231 /*2 -------------------------------------------------------3 encoder Setting4 timebase = num/den = 1001/(fps x 1000) = 1001/60000 = 1/59.94 (1/fps)5 -------------------------------------------------------6 */78 /* find the h.264 video encoder */9 enc = avcodec_find_encoder(AV_CODEC_ID_H264);1011 enc_ctx = avcodec_alloc_context3(enc);1213 /* put sample parameters */14 enc_ctx->bit_rate = 40000000; //40Mbps15 /* resolution must be a multiple of two */16 enc_ctx->width = 3840;17 enc_ctx->height = 2160;18 /* frames per second */19 enc_ctx->time_base.den = 60000;20 enc_ctx->time_base.num = 1001;21 enc_ctx->gop_size = 10; /* emit one intra frame every ten frames */22 enc_ctx->max_b_frames = 1;23 enc_ctx->pix_fmt = AV_PIX_FMT_YUV420P;인코더 초기화
avcodec_open2 함수를 사용하여 Encoder 초기화
xxxxxxxxxx21 /* init the video encoder */2 avcodec_open2(enc_ctx, enc, NULL);Encoding
먼저 입력 파일을 받아들여야 하기 떄문에 Decoding을 수행하고 다음 Encoding을 수행하게 된다. AVPacket 구조체의 Data 값이 Encoder 결과 값이며 Data의 Size는 AVPacket 구조체의 Size 값이다.
xxxxxxxxxx271 /*2 -------------------------------------------------------3 Processing4 -------------------------------------------------------5 */67 while (av_read_frame(pFmtCtx, &packet) >= 0) {8 if (packet.stream_index == nVSI) {9 // Decode Video10 avcodec_decode_video2(pVCtx, pVFrame, &bGotPicture, &packet);11 if (bGotPicture) {12 //encoding13 av_init_packet(&outpkt);14 outpkt.data = NULL;15 outpkt.size = 0;1617 avcodec_encode_video2(enc_ctx, &outpkt, pVFrame, &got_output);18 if (got_output) {19 /* write or send the frame */20 fwrite(outpkt.data, 1, outpkt.size, pEnc);2122 av_free_packet(&outpkt);23 }24 // Final Substage25 ulnVFrame++;26 }27 }Muxing
다음을 참조한다 https://www.ffmpeg.org/doxygen/3.1/group__lavf__encoding.html
av_write_frame av_write_interleaved_frame 을 사용하여 Muxing을 수행한다.
ffmpeg의 IO 방식
AVISynth의 기본 명령어 사용법 (Case by Case)
다음 사이트에서 부터 시작하면 된다. http://focsw.tistory.com/149
Bitnami Redmine Stack에서 Subversion Server 설정
많은 삽질 끝에 알아낸 방법이다.. 일단 대부분의 방법은 기존의 웹에 있던 방식과 동일하다. 다른 것은 만일, 다른 Subversion 서버들이 같이 돌아가고 있기 때문에 포트를 Default로 사용하고 있는 3690 포트가 아니라 3691 과 같은 특이한 포트를 사용한다는 가정이다.
이 경우 세팅해야 할 부분들을 체크하면 다음과 같다.
먼저 Subversion 서비스를 내린다. 다음 Repository Directory는 c:\SVN 이라 가정하고 여기에 test 라는 Repository를 하나 만들었다고 가정하자. 즉, c:\SVN\test 가 하나 있다.
Subversion Config 파일 수정
c:\Bitnami\redmine-2.6.5-0\subversion\scripts\serviceinstall.bat 파일을 다음과 같이 수정한다.
xxxxxxxxxx11"C:\Bitnami\redmine-2.6.5-0/subversion\scripts\winserv.exe" install redmineSubversion -displayname "redmineSubversion" -start auto "C:\Bitnami\redmine-2.6.5-0/subversion\bin\svnserve.exe" -d --listen-port=3691 --root "c:\svn"
주의할 점은 --listen-port=3691 이다.
c:\Bitnami\redmine-2.6.5-0\properties.ini 파일에서 [subversion] 항목을 찾아서 해당 항목의 port가 3691인가를 확인한다.
xxxxxxxxxx41[Subversion]2subversion_port=36913subversion_root_directory=C:\Bitnami\redmine-2.6.5-0/subversion4subversion_unique_service_name=redmineSubversion
WIndows 방화벽 세팅
Windows 방화벽에서 먼저, C:\Bitnami\redmine-2.6.5-0/subversion\bin\svnserve.exe 를 찾아, 방화벽에서 예외로 만들어야 한다. 그 다음 방화벽->고급설정->인바운드 규칙에서 해당 규칙을 "개인용/Domain/공용" 모두 해당되도록 세팅한다.
이렇게 세팅한 다음 반드시 컴퓨터를 껐다 켜야 한다. 그래야 제대로 방화벽 예외가 적용된다.
새로켜진 컴퓨터에서 Subversion 서비스가 제대로 동작하고 있으면 TotoiseSubversion 으로 테스트 Repository를 Checkout 하면 된다. 완벽하게 동작한다.
Debugging
Repository 경로 문제
그런데 위에서 Subversion Config 과정에서 --root "c:\svn" 부분을 잘못 적으면 예를 들어, 실제로 존재하지 않는 폴더를 적는다든지 하게 되면 문제를 일으키게 된다. 또한 가급적이면 드라이브는 SUbversion이 설치되어 있는 드라이브를 지정해야 한다.
Filesystem 문제
떄로는 Filesystem의 예상되는 수는 1에서 6인데 실제 파일 시스템은 7이라는 에러를 내면서 Checkout이 되지 않는 경우가 있다. 이는 서브버전의 버전 문제로서 서브버전 Repository의 format에 7이라는 수가 적혀 있은 경우가 있기 때문이다. 이를 해결하기 위해서는 ** svnadmin create 실제경로 --pre-1.4-compatible ** 이런 식으로 적어주게 되면 예상 파일시스템의 수는 3이 되면서 문제를 해결할 수 있다.
Xming을 PuTTY와 연결해서 간단하게 원격 연결 사용하는 방법
다음 사이트를 참조한다.
다음의 순서로 Xming을 사용하여 리눅스를 GNOME 환경으로 사용할 수 있다.
Xming 설치
Xming 서버는 Windows에서 돌아가고, 세팅은 XLauncher를 세팅한다.
Display setting
리눅스 서버에 원격 연결한 PuTTY에서 원하는 프로그램을 X-Windows 환경으로 띄우기에는 Multiple windows가 적당한 것 같다

바로 창을 실행할지 선택하는 화면
Start no client를 클릭하고 나중에 푸티와 연동해서 사용하면 된다.

Specify Parameter Settings
다음을 클릭한다.

Final Setting
마침을 클릭한다.

Putty 주소 세팅
먼저 주소를 세팅한다. 기존의 데이터가 있으면 Load한다.

X11 Forward Setting
SSH 에서 X11 Forwarding을 세팅한다.

Putty SSH 연결
X11 Forwading 세팅 후 Open을 누르면 SSH 창이 뜬다.
창이 뜨지 않는 경우는 위에서 Putty 주소를 세팅하지 않은 경우이다.
그리고 항상 X11 Forwarding 을 활성화 시키기 위해서는 Open 직전에 주소 세팅에서 해당 세션을 Save 해야 한다.

구동 예
위에서 처럼 할 경우 다음과 같다.

Linux Shell Script
표준입력, 표준에러, 리다이렉션, 백그라운드
xxxxxxxxxx11nohup ${DIR}/bin/scheduler scheduler.ini >scheduler.out 2>&1 &
여기서 2>&1 & 은 무얼 의미하나요?
앞부분의 "2>&1"은 표준오류 스트림을 표준출력으로 돌리라는(?) 뜻입니다. 그냥 ">"를 기준으로 보면 "2"를 "&1"로 보내라는 뜻인데, 여기서 "2"는 표준오류 스트림을 나타내는 번호이고 "1"은 표준출력을 나타내는 번호입니다. 마지막 "&" 는 백그라운드로 실행하라는 뜻이구요.
/dev/null 은 출력을 /dev/null로 하겠다는 소리입니다. 즉 출력이 안보이겠죠.
&1이 의미하는 것은 출력을 표준 출력에다가 하겠다는 소리입니다. <&0은 당연히 표준 입력이 되겠죠.
Process 찾기
Linux Shell Script 에서
xxxxxxxxxx31for p in `ps aux | grep Hevc | grep -v grep | awk '{print $2}'`2do kill -9 $p3done
여기서
xxxxxxxxxx11ps aux | grep Hevc
이면
xxxxxxxxxx21root 12652 8.7 20.5 12350640 1662208 pts/1 Sl 00:59 0:01 ./HevcEncWorker -c configure.ini2root 13299 0.0 0.0 112640 960 pts/1 S+ 01:00 0:00 grep --color=auto Hevc
이러한 정보가 나온다. 여기에서 정확하게 HevcEncWorker 만 가져오기 위해서는 Hevc 검색 process를 삭제해야 한다. 그것만 빼야한다. 그래서 해당 되는 것 중 grep 이 있는 것만 Select 하여 없야야 하는데 그것이 ** -v ** 옵션이다. 이 옵션을 사용하여 non-matching Line을 선택하도록 하면, 즉, grep 이라는 단어가 없는 라인을 선택하도록 하면 정확히 Hevc Encoder만 선택하게 된다.
xxxxxxxxxx11ps aux | grep Hevc | grep -v grep
이렇게 되면 위의 두 프로세스 중 HevcEncWorker Process만 선택된다. 여기에서 두번쨰 정보가 프로세스 넘버 이므로.. ** awk ** 명령을 사용하여 이것만 추출한다.
awk란? awk란 이름은 이 유틸리티를 작성한 A.V.Aho, P.J. Weinberger, B. Kernigham의 머리글자를 따온 것 ① awk는 일종의 프로그래밍 언어지만 일반적인 언어라기 보다는 주로 패턴의 검색과 조작을 주목적으로 만들어진 것이다. ② 파일의 각 라인에서 필드(field)를 인식할 수 있는 패턴 매칭 기능을 가지고 이들 필드를 자유자재로 조작 가능한 유틸리티를 작성하고자 만든 것이다.
Windows 용 Subversion 설치
SVN Download Url 은 다음과 같다. 그냥 구글에서 검색해도 된다. http://subversion.tigris.org/servlets/ProjectDocumentList?folderID=11151&expandFolder=11151&folderID=91
다운로드 싸이트로 가보면 window 64bit 용은 없는걸로 보인다. 2010년이 가장 마지막 버전으로 보이므로 제일 위에 있는걸로 받는다. 여기서 최신 버전을 다운 받는 다. 1.6.9 던가 10이 최신 버전이다.
설치는 매우 간단하다. 중요한 것은, Windows에서는
- Windows 서비스로 등록
- Windows 방화벽 세팅
두가지가 가장 중요한 것이다. 이것만 제대로 되면 나머지는 문제가 없다.
SVN Reposoitory
먼저 Repository Directory를 하나 만든다. 이번의 경우, SSH 접속까지 고려하기 때문에.. "C:\User\root\SVN_Repository" 라고 만들었다. 여기에 테스트용 SVN Repository를 하나 만든다.
xxxxxxxxxx11svnadmin create --fs-type fsfs tets_svn
이것이 다른 컴퓨터에서 SUbversion Checkout이 되어야 한다. 그래서 일단 해당 test_svn\conf 로 가서 passwd 파일과 svnserv.conf를 맞춘다.
Windows 서비스 등록
Windows 에서 Service 등록하는 명령어는 ** sc ** 이다. 다음과 같다.
xxxxxxxxxx541C:\Users\root>sc2DESCRIPTION:3SC is a command line program used for communicating with the4Service Control Manager and services.5USAGE:6sc <server> [command] [service name] <option1> <option2>...789The option <server> has the form "\\ServerName"10Further help on commands can be obtained by typing: "sc [command]"11Commands:12query-----------Queries the status for a service, or13enumerates the status for types of services.14queryex---------Queries the extended status for a service, or15enumerates the status for types of services.16start-----------Starts a service.17pause-----------Sends a PAUSE control request to a service.18interrogate-----Sends an INTERROGATE control request to a service.19continue--------Sends a CONTINUE control request to a service.20stop------------Sends a STOP request to a service.21config----------Changes the configuration of a service (persistent).22description-----Changes the description of a service.23failure---------Changes the actions taken by a service upon failure.24failureflag-----Changes the failure actions flag of a service.25sidtype---------Changes the service SID type of a service.26privs-----------Changes the required privileges of a service.27qc--------------Queries the configuration information for a service.28qdescription----Queries the description for a service.29qfailure--------Queries the actions taken by a service upon failure.30qfailureflag----Queries the failure actions flag of a service.31qsidtype--------Queries the service SID type of a service.32qprivs----------Queries the required privileges of a service.33qtriggerinfo----Queries the trigger parameters of a service.34qpreferrednode--Queries the preferred NUMA node of a service.35delete----------Deletes a service (from the registry).36create----------Creates a service. (adds it to the registry).37control---------Sends a control to a service.38sdshow----------Displays a service's security descriptor.39sdset-----------Sets a service's security descriptor.40showsid---------Displays the service SID string corresponding to an arbitrary name.41triggerinfo-----Configures the trigger parameters of a service.42preferrednode---Sets the preferred NUMA node of a service.43GetDisplayName--Gets the DisplayName for a service.44GetKeyName------Gets the ServiceKeyName for a service.45EnumDepend------Enumerates Service Dependencies.4647The following commands don't require a service name:48sc <server> <command> <option>49boot------------(ok | bad) Indicates whether the last boot should50be saved as the last-known-good boot configuration51Lock------------Locks the Service Database52QueryLock-------Queries the LockStatus for the SCManager Database53EXAMPLE:54sc start MyService
새로 서비스를 만드는 경우 즉, ** sc create ** 의 경우에는 다음과 같다.
xxxxxxxxxx231C:\Users\root>sc create2DESCRIPTION:3Creates a service entry in the registry and Service Database.4USAGE:5sc <server> create [service name] [binPath= ] <option1> <option2>...67OPTIONS:8NOTE: The option name includes the equal sign.9A space is required between the equal sign and the value.10type= <own|share|interact|kernel|filesys|rec>11(default = own)12start= <boot|system|auto|demand|disabled|delayed-auto>13(default = demand)14error= <normal|severe|critical|ignore>15(default = normal)16binPath= <BinaryPathName>17group= <LoadOrderGroup>18tag= <yes|no>19depend= <Dependencies(separated by / (forward slash))>20obj= <AccountName|ObjectName>21(default = LocalSystem)22DisplayName= <display name>23password= <password>
이에 따라 다음과 같이 SVN Server의 서비스를 등록해 주어야 한다.
xxxxxxxxxx11sc create svn_1 binPath= "c:\Program Files (x86)\Subversion\bin\svnserve.exe --service -r C:\Users\root\SVN_Repository" DisplayName= "Subversion Server_1" depend= Tcpip start= auto
이때 주의할 점은 sc create 를 사용할 경우에는 ** Option= Option_Value** 와 같이 등호 다음에 한칸을 꼭 띄워 주어야 한다는 점이다. 이렇게한 다음 ** 제어판>관리도구>서비스 ** 로 간 다음, 서비스에서 ** Subversion Server_1 ** 을 시작하면 된다.
혹은 이것도 괜찮다. 서비스 이름이 svnserve 이며 환경변수 ** %PROGRAMFILES(X86)% ** 를 사용하였다.
xxxxxxxxxx11C:\Users\Admin>sc create svnserve binpath= "%PROGRAMFILES(X86)%\Subversion\bin\svnserve.exe --service --root "C:\Users\root\SVN_Repository"" displayname= "Subversion Server" depend= tcpip start= auto obj= "NT AUTHORITY\LocalService"****
방화벽 해제
추가로 ** Subversion/bin ** 밑의 ** svnserver.exe ** 의 방화벽을 해제하면 된다.
Windows 배치 파일, For 문 사용한 변수배열
다음의 예제를 보자
xxxxxxxxxx1912for /L %%v in (1,1,7) do call :Routine %%v34goto:Eof56:Routine7SET TTA[1]=Beauty_3840x2160_120fps_420_10bit_YUV.yuv8SET TTA[2]=Bosphorus_3840x2160_120fps_420_10bit_YUV.yuv9SET TTA[3]=HoneyBee_3840x2160_120fps_420_10bit_YUV.yuv10SET TTA[4]=Jockey_3840x2160_120fps_420_10bit_YUV.yuv11SET TTA[5]=ReadySetGo_3840x2160_120fps_420_10bit_YUV.yuv12SET TTA[6]=ShakeNDry_3840x2160_120fps_420_10bit_YUV.yuv13SET TTA[7]=YachtRide_3840x2160_120fps_420_10bit_YUV.yuv1415SET InputFIle=%%TTA[%1]%%1617call echo %1 : %InputFile%1819goto:eof
즉, For 문을 사용하여 Subroutine으로 For 문 변수를 보내고 변수는 Subrotine에 정의하여 사용하면 된다.
실제 For문 사용한 변수배열로 만들어진 배치파일
Configure File의 video_file_name 을 배열에 지정되어 있는 파일 이름으로 자동 수정하여 연속으로 돌릴 수 있도록 한 예제이다. video_file_name= 부분 까지 헤더로 만든 다음 Space 없이 줄 바꿈 까지 있어야 제대로 시스템이 Configure 파일의 Parameter를 읽어 들일 수 있다. 그리고 그 이후 부분을 _tail.txt 로 만들어 붙이면 자동으로 configure 파일이 생성되는 원리이다.
조금만 더 자동화 시키면 Frame 및 Slice 인코딩도 인자로서 보내 줄 수 있다.
xxxxxxxxxx371@echo off2echo.3echo #########################################################4echo TTA Test Encoding5echo Usage : encode.bat6echo Jinwuk Seok : 2017.01.257echo #########################################################8echo.910::echo on1112for /L %%v in (1,1,7) do call :Routine %%v1314goto:Eof1516:Routine17chcp 9491819SET TTA[1]=Beauty_3840x2160_120fps_420_10bit_YUV.yuv20SET TTA[2]=Bosphorus_3840x2160_120fps_420_10bit_YUV.yuv21SET TTA[3]=HoneyBee_3840x2160_120fps_420_10bit_YUV.yuv22SET TTA[4]=Jockey_3840x2160_120fps_420_10bit_YUV.yuv23SET TTA[5]=ReadySetGo_3840x2160_120fps_420_10bit_YUV.yuv24SET TTA[6]=ShakeNDry_3840x2160_120fps_420_10bit_YUV.yuv25SET TTA[7]=YachtRide_3840x2160_120fps_420_10bit_YUV.yuv2627SET InputFIle=%%TTA[%1]%%2829type _header.txt > configure.ini30call echo %InputFIle%>> configure.ini31call echo. >> configure.ini32type _tail.txt >> configure.ini3334HevcEncoder.exe -c configure.ini35rename video_3840x2160_5994fps_yuv420p10.h265 Slice_TTA_%1.bin3637goto:eof
SSH connection without Password
http://t2-cms.knu.ac.kr/wiki/index.php/Ssh_Public_key_Authentication
MinGW 환경에서 SSH Key를 생성하고 이를 181 서버에 등록하여 ssh 접속시 password 없이 접속하는 방법을 알아본다.
xxxxxxxxxx11ssh-keygen -t rsa
를 통해 먼저 공개 키를 생성한다. (생성위치 C:\MinGW\msys\1.0\home\Admin.ssh) 아무것도 입력하지 않고 단순히 엔터만 쳐준다.
xxxxxxxxxx241C:\Users\Admin>2C:\Users\Admin>ssh-keygen -t rsa3Generating public/private rsa key pair.4Enter file in which to save the key (/home/Admin/.ssh/id_rsa):5Enter passphrase (empty for no passphrase):6Enter same passphrase again:7Your identification has been saved in /home/Admin/.ssh/id_rsa.8Your public key has been saved in /home/Admin/.ssh/id_rsa.pub.9The key fingerprint is:10d1:8e:e9:ba:24:35:54:da:93:a5:c8:78:a3:b1:cf:1f Admin@Jinwuk-pc14411The key's randomart image is:12+--[ RSA 2048]----+13| . . |14| o = = |15| o B * . |16| * . * |17| o o S . |18| + o |19| . + E |20| o o . |21| o.. |22+-----------------+2324C:\Users\Admin>
만들어진 id_rsa.pub 파일을 서버의 root 디렉토리로 복사한다. 이를 ** ./ssh ** 폴더의 ** authorized_keys ** 에 복사해야 한다. 다음과 같이 해야 한다.
xxxxxxxxxx11root@vcahost-one .ssh]# cat ../id_rsa.pub >> authorized_keys
이렇게 되면 그 다음 부터 MinGW BASH에서 ssh 접속시, passwd 없이 ssh 접속이 가능하다.
만일, Windows Command 상에서 다른 SSH client로 접속시에는 다음과 같다.
xxxxxxxxxx91C:\MinGW\msys\1.0\home\root\.ssh>ssh-keygen -t rsa2Generating public/private rsa key pair.3Enter file in which to save the key (/cygdrive/c/Users/root/.ssh/id_rsa):4Enter passphrase (empty for no passphrase):5Enter same passphrase again:6Your identification has been saved in /cygdrive/c/Users/root/.ssh/id_rsa.7Your public key has been saved in /cygdrive/c/Users/root/.ssh/id_rsa.pub.8The key fingerprint is:90e:ad:18:35:49:5d:ac:15:0a:11:36:e3:8c:2d:57:26 root@DESKTOP-SC0DPH5
이렇게 만들어진 SSH Key는 Permission 문제를 일으킨다. 다음과 같은 메시지를 출력 시킨다.
xxxxxxxxxx61WARNING: UNPROTECTED PRIVATE KEY FILE! @2@@@@@@@@@@@@@@@@@@@@@@@@@@@@@@@@@@@@@@@@@@@@@@@@@@@@@@@@@@@3Permissions 0644 for '/cygdrive/c/Users/root/.ssh/id_rsa' are too open.4It is recommended that your private key files are NOT accessible by others.5This private key will be ignored.6bad permissions: ignore key: /cygdrive/c/Users/root/.ssh/id_rsa
Permission이 0644 이기 때문에 발생하는 일인데... 고치기가 쉽지 않다. Windows 에서 Linux SSH 가 정상적으로 인식하는
Apache 서버의 설치와 기동
다음의 명령어를 사용하면 된다.
To Install Apache as a service:
In most cases you will want to run Apache as a Windows Service. To do so you install Apache as a service by typing at the command prompt [1];
xxxxxxxxxx11httpd -k install
You can then start Apache by typing
xxxxxxxxxx11httpd -k start
Apache will then start and eventually release the command prompt window.
[1] You have to run the command prompt as Administrator in Windows Vista/7/2008/8/8.1/10/2012/
Other Command line options:
| Action | command |
|---|---|
| Stop Apache | httpd -k stop |
| Restart Apache | httpd -k restart |
| Uninstall Apache Service | httpd -k uninstall |
| Test Config Syntax | httpd -t |
| Version Details | httpd -V |
| Command Line Options List | httpd -h |
Git
SSL 관련 디버깅
Clone 시 https 에서 Clone 이 제대로 되지 않을 떄
BASH 에서는 다음과 같이 하면 된다.
xxxxxxxxxx11git config --global http.sslVerify false
TortoiseGit 에서는 다음과 같이 해야 한다. ** Setting ->
WebDAV 기반 Git Server 설치
기본적으로 Git Server 설치는 어려운 것이 아니다. 일반적인 서버에 Git 서버를 연결해주는 것으로 끝난다. Git Server를 위해서는 반드시 Git 자체를 설치해야 한다.
일단 서버의 경우 다음과 같이 bare Git Repository를 htdocs에 만든다.
이 두 명령어는 Windows Commander로 만들고
xxxxxxxxxx21mkdir test_git.git2cd test_git.git
git 명령은 Windows용 Git Bash를 사용해야 한다. 디렉토리는 test_git.git 이다.
xxxxxxxxxx21git --bare init2git update-server-info
httpd.conf 에서 WebDav 활성화 시키기
일단, Apache 서버를 끄고 ** /conf/ httpd.conf ** 에서 다음을 찾아보자.
xxxxxxxxxx11Dynamic Shared Object (DSO) Support
이 항목에서 다음의 Module 3개가 모두 Load 되도록 한다.
xxxxxxxxxx31LoadModule dav_module modules/mod_dav.so2LoadModule dav_fs_module modules/mod_dav_fs.so3LoadModule dav_lock_module modules/mod_dav_lock.so
그 다음 Password File을 생성해야 한다. Bin 밑에 보면 htpasswd 가 있다. 이것을 사용하여 다음과 같이 만들자.
xxxxxxxxxx11$ htpasswd -c passwd.git <user>
그러면 password 를 묻는다. Password를 입력하면 passwd.git 파일이 생성된다. passwd.git 파일을 /conf 밑에 복사한다. 사용자를 추가하기 위해서는 위에서 passwd.git 에 –c 옵션 없이 사용자를 추가하면 된다.
다시, httpd.conf 파일을 열어서 다음과 같이 편집한다.
xxxxxxxxxx141# WebDAV for Git Server2# First Locking DAV Operation using DavLockDB3# Second Including the following Directory4#5DavLockDB "c:\Bitnami\redmine-2.4.2-0\apache2\var\DavLock"7<Location /test_git.git>9DAV on10AuthType Basic11AuthName Git12AuthUserFile conf/passwd.git13Require valid-user14</Location>
DavLockDB 경로를 잘 적어 주어야 한다. User의 경우 valid-user로 해주어야 한다. Apache 서버를 다시 Enable 시킨다. 이 정도만 하면 http://jnwhome.iptime.org/test_git.git 하면 해당 페이지를 볼 수 있다 (ID와 PW 입력 후)
그리고 가장 중요한 점은… Test_git.git 폴더의 권한을 잡아 주어야 한다. Linux에서는 이 부분을 chmod 혹은 chown -R www.www 을 통해 수행하는데 Windows 에서는 전혀 다르다. Windows에서는 test_git.git 에 우측 마우스를 대고 속성->보안으로 들어가서 Authenticated Users를 모든 권한으로 해 주어야 한다. 안 그러면 Git 에서 에러가 난다. 이로서 WebDav로 인증된 사용자가 Git Remote 서버를 인증하여 사용할 수 있게 된다.
Client 에서는?? 만일 Git Bash가 있다면 다음과 같이 하면 된다. (경로는 Windows 경로가 되도록 한다)
xxxxxxxxxx81mkdir ~/Desktop/test-project2cd ~/Desktop/test-project3git init4git remote add origin http://<user>@<server name or IP address>/test-project.git5touch README6git add .7git commit -a -m “Initial import”8git push origin master
만일 TortoiseGit 이 설치되어 있다면 다음과 같이 한다. 일단, Git Repository here 를 수행하여 특정 폴더를 git Repository 로 만든다. Bare로 만들면 안된다. TortoiseGit -> Setting -> Git 에서 설정을 확인한 후 (사용자 정보와 이메일) Git->Remote를 설정한다. (매우 중요)
xxxxxxxxxx21<URL>2http://jnwhome.iptime.org/test_git.git
이것만 넣어 주어도 자동적으로 origin 이 뜬다. 다음이 중요하다.
xxxxxxxxxx21<Push URL>2http://MyID:MyPW@jnwhome.iptime.org/test_git.git
꼭 ID와 PW를 http:// 앞에 같이 써주어야 한다. 그리고 PUSH를 해주면 Remote에 Push가 된다.
Debugging : WebDavLockDB 설치
http.conf 에서 다음 부분을 제대로 세팅해야 한다. 이 부분의 폴더와 파일 이름이 제대로 만들어지지 않을 경우 Git Push에서 에러가 발생한다.
xxxxxxxxxx11DavLockDB "c:\Apache22\var\DavLock"
해당 폴더에 다음과 같이 파일을 만들어 넣어야 한다.
xxxxxxxxxx31cd c:\Apache22\var2touch DavLock.dir3touch DavLock.pag
해당 파일의 크기는 전부 0 이다. 정상적으로 WebDaV가 동작하면 해당 파일들이 업데이트 된다.
https (SLS) 기반 Git Server 설치
https를 사용하는 것은 프로토콜의 문제이다. 그러므로, 이 자체는 만일 웹 브라우저에서 해당 Git 폴더가 제대로 보이기만 하면 문제가 없다는 의미이다. 여기를 통과한 후, WebDaV를 통해 PUSH가 가능해지는 것이다. 즉,
이러한 구조이다. 그러므로 WebDaV를 제대로 설치하는 것이 맞는 것이다.
간단한 Git Checkout 사용법
xxxxxxxxxx11git checkout HEAD~1
일단 이렇게 하면 working directory 와 staging area를 모두 1단계 전 커밋으로 돌려 준다. 당연하겠지만 HEAD~ 뒤의 숫자는 몇단계로 돌아갈지의 개수다.
xxxxxxxxxx11git checkout HEAD~10
10단계 전 커밋으로 돌아간다. 다시 돌아오는 방법은
xxxxxxxxxx11git checkout master
마스터 브랜치로 돌아오는 명령인데, 마스터 브랜치가 아닌 다른 브랜치명을 적어도 상관없댄다. 해당 브랜치로 복귀하게 된다.
Git Checkout : 특정 커밋으로 돌아가기
다음과 같이 Git Commit Log가 있다고 하자
xxxxxxxxxx171commit a1d1bfe13a54a53ed8d6dd02c8ba08f4e6a963152Author: Wasabi3Date: Tue Jun 16 10:08:29 2015 +090045커밋 367commit 9d51a775c60d2358313645a6364975279cb2d28f8Author: Wasabi9Date: Mon Jun 15 16:36:37 2015 +09001011커밋 21213commit dfdebeb772aa40af8cb2875fcb50143b17ca787f14Author: Wasabi15Date: Wed May 6 11:49:16 2015 +09001617커밋 1
각각 commit 해시값이 있다. 이 고유번호의 앞 6자리만 적어 주면 알아서 식별을 한다. 커밋 2로 돌아가고 싶으면
xxxxxxxxxx11git checkout 9d51a7
Secure Copy (SCP) 사용법
UNIX 계열/Linux - 명령어 2011.12.29 15:17 local 서버에서 remote 서버에 파일을 올리고 받을 때는 주로 FTP를 사용하지만, 시스템을 설정하고 테스트하고 잦은 파일 교환 작업을 할 때는 GUI툴을 사용하지 않고 local에서 파일을 복사하듯이 사용해야 할 때가 있다. SSH를 통해서 scp 명령으로 안전하고 간단하게 파일을 복사할수 있다.
xxxxxxxxxx11$ scp <옵션> <원본 경로 및 파일> <복사 받을 곳 경로 및 파일>
명령어 옵션 Remote 서버 경로 local 서버 경로
Remote 서버에 파일 올리기
xxxxxxxxxx11$ scp -P 22 /home/myhome/abc.tar oracle@123.456.78.9:/home/oracle/
abc.tar 파일을 123.456.78.9 서버의 22번 포트로 SSH 접속하여 oracle 사용자로 로그인 한 후 /home/oracle/ 아래에 복사한다.
Remote 서버에서 파일 받기
xxxxxxxxxx11$ scp -P 22 root@123.456.78.9:/usr/local/abc.xml /home/oracle/
remote 서버의 abc.xml 파일을 local의 /home/oracle로 다운로드 받는다.
SSH포트는 변경하는 경우가 많으므로 -P 옵션 사용했고, 서버 주소와 디렉토리의 구분은 콜론(:)을 사용한다. 원격지의 home 주소는 "./"를 사용해도 된다. Ex) root@123.456.78.9:./
자주사용하는 옵션
-P : 포트번호 지정 -p : preserve의 약자로 원본 파일 시간의 수정시간, 사용시간, 권한을 유지한다. -r : recursive의 약자로 하위 폴더/파일 모두 복사한다.
ETRI에서 SSH 사용
- Default Port 22번은 막혀 있다.
- port : 1022 로 변경해야 한다.
한글이 깨지는 문제
Putty의 경우
먼저 접속하여는 Setting을 선택하여 Load 시킨다.
Windows -> Translation 에서 Character set을 UTF-8 로 변경 시킨다.
추가로 Putty 창을 크게 만들고 싶으면 Windows->Columns/Rows 값을 크게 한다.
- 현재 140 Column, 34 Rows를 사용중에 있다.
- Lines of scroll back을 10000 로 크게 만들면 이것도 사용하기에 편리하다.
ConEmu의 경우 Setting 혹은 CTRL+ALT+P 에서 Font character set이 Hangul 인지 확인한다.
- 그래도 깨지면 chcp 65001 을 직접 CMD에서 입력하여 UTF-8을 사용하도록 한다.
Marp에서 Align Environment in Math mode
- 해결은 간단했다. KaTex에서 지원하는 begin{aligned}를 사용하면 된다.
- 다음의 코드를 사용하면 된다.
- aligned는 어디에서건 다 잘 먹는다.
xxxxxxxxxx61$$2\begin{aligned}3dY_t &= \left(\frac{\partial h}{\partial x} \cdot (f(X_t) + g(X_t)u) + \frac{1}{2}\frac{\partial^2 h}{\partial x^2} \right)dt + \frac{\partial h}{\partial x} dW_t \\4&= \left( L_f h(X_t)+L_g h(X_t)u + \frac{1}{2}\nabla \cdot \nabla h(X_t)\right) dt + \nabla h(X_t) dW_t5\end{aligned}6$$
- 다음과 같이 색상으로 하이라이팅을 할 수도 있다.
xxxxxxxxxx61$$2\begin{aligned}3dY_t &= \color{red}{\left(\frac{\partial h}{\partial x} \cdot (f(X_t) + g(X_t)u) + \frac{1}{2}\frac{\partial^2 h}{\partial x^2} \right)dt} + \color{blue}{\frac{\partial h}{\partial x} dW_t} \\4&= \color{green}{\left( L_f h(X_t)+L_g h(X_t)u + \frac{1}{2}\nabla \cdot \nabla h(X_t)\right) dt} + \nabla h(X_t) dW_t5\end{aligned}6$$
다음 Link를 통해서 알 수 있었다. https://github.com/yhatt/marp/issues/103
Visual C++ 2013에서 Python Embedding
결론적으로 #include < python.h > 이 정상 동작하여야 한다.
Compile 옵션에서
- Properties C/C++ General Additional Include Directories
- 다음을 입력
xxxxxxxxxx11C:\ProgramData\Anaconda3\includexxxxxxxxxx11C:\Users\Admin\AppData\Local\Programs\Python\Python35\includeLinker Option 에서
Properties Linker General Additional Library Directories
다음을 입력 (이때, LIB 가 아닌 libs Directory 이다)
xxxxxxxxxx11C:\ProgramData\Anaconda3\libsxxxxxxxxxx11C:\Users\Admin\AppData\Local\Programs\Python\Python35\libs
Python Directory 찾기
- Anaconda 등을 설치하면서 Python은 자동으로 설치된다.
- 이때 환경변수를 뒤져서 Python이 설치된 Directory를 알아낸다.
참고 사이트
https://docs.microsoft.com/ko-kr/visualstudio/python/working-with-c-cpp-python-in-visual-studio
Python Embedding
xxxxxxxxxx891int2main(int argc, char *argv[])3{4 PyObject *pName, *pModule, *pDict, *pFunc;5 PyObject *pArgs, *pValue;6 int i;78 if (argc < 3) {9 fprintf(stderr,"Usage: call pythonfile funcname [args]\n");10 return 1;11 }1213 Py_Initialize();14 15 //Python 프로그램 이름을 얻는다. (예를 들어 Iterative_Weight.py 이면 Iterative_Weight 면 된다.)16 pName = PyUnicode_DecodeFSDefault(argv[1]);17 18 /* Error checking of pName left out */1920 //Python 프로그램에서 Module을 가져온다. 즉, Python script를 String 형태로 가져온다.21 pModule = PyImport_Import(pName);22 Py_DECREF(pName); // Reference Count를 하나 줄인다. PyImport_Import의 인자로 pName이 사용되었기 때문에. 23 // PyObject는 사용되면 무조건 Reference Value가 증가하여 재사용이 어렵다. 2425 if (pModule != NULL) {26 27 // Module에서 Attribute String 중 argv[2]로 지정된 Function 이름을 가져온다. 28 pFunc = PyObject_GetAttrString(pModule, argv[2]);29 /* pFunc is a new reference */3031 // pFunc로 지정된 Function 이름이 함수로서의 Validity를 Check한다. 32 if (pFunc && PyCallable_Check(pFunc)) {33 34 // 함수 입력 Argument를 지정한다. 1: Python Name 2: Module 3: Fumc 이므로 4부터 Argument 이다.35 pArgs = PyTuple_New(argc - 3);36 for (i = 0; i < argc - 3; ++i) {37 38 // Argument를 Python Long 형으로 바꾸어 pValue로 만든다. 39 pValue = PyLong_FromLong(atoi(argv[i + 3]));40 41 if (!pValue) {42 // pValue 가 없으면 pArgs, pModule 전부 제자리로 돌린다.43 Py_DECREF(pArgs);44 Py_DECREF(pModule);45 fprintf(stderr, "Cannot convert argument\n");46 return 1;47 }48 /* pValue reference stolen here: */4950 // Python Value를 pArgs의 순서에 맞게 넣어 준다. 51 PyTuple_SetItem(pArgs, i, pValue);52 }53 54 // Python 함수를 pArg 입력을 통해 호출한다. 결과 값은 pValue에 들어간다.55 pValue = PyObject_CallObject(pFunc, pArgs);56 Py_DECREF(pArgs);57 if (pValue != NULL) {58 printf("Result of call: %ld\n", PyLong_AsLong(pValue));59 Py_DECREF(pValue);60 }61 else {62 // 정상적으로 함수가 호출되면 pFunc/pModule 모두 Ref Counter가 1씩 증가한다. 63 // 따라서 Decrement 시켜야 함64 Py_DECREF(pFunc);65 Py_DECREF(pModule);66 PyErr_Print();67 fprintf(stderr,"Call failed\n");68 return 1;69 }70 }71 else {72 if (PyErr_Occurred())73 PyErr_Print();74 fprintf(stderr, "Cannot find function \"%s\"\n", argv[2]);75 }76 Py_XDECREF(pFunc);77 Py_DECREF(pModule);78 }79 else {80 PyErr_Print();81 fprintf(stderr, "Failed to load \"%s\"\n", argv[1]);82 return 1;83 }84 85 if (Py_FinalizeEx() < 0) {86 return 120;87 }88 return 0;89}Markdown : Typora 관련
수식 Reference
수식 Reference와 관련하여 다음과 같이 맞추니 정상적으로 Reference 숫자가 들어갔다. 다음과 같이 Markdown을 사용했다고 가정하자.
xxxxxxxxxx51$$2dX_t3$$5Suppose that there are two solution $X_t$ and $\tilde{X}_t$ of the equation $\eqref{eq01:DE}$ and the solutions are **Path-wise unique** almost surely on the same sample path on $[t_0, T]$ such that여기서 방정식의 경우이므로 eqref를 사용했다. 이렇게 하면 처음에는 당연하게 Mutiple Definition Error가 뜨면서 문제가 생긴다.
다음과 같이 한다.
- 파일-> 환경설정->수식블록->수식 자동 번호 매기기 를 Check 한다.
- Typora를 Close 한다.
- Typora를 다시 Call 한다.
자동 번호가 그대로 eqref 와 연동되면서 정확한 수식이 된다. 다음과 같이 나타나게 된다.
Suppose that there are two solution and of the equation and the solutions are Path-wise unique almost surely on the same sample path on such that
[ Python ] URL에서 가져온 파일명 그대로 추출하기
xxxxxxxxxx51url = 'http://image.mujikorea.net/goods/31/03/59/87/4934761397078_N_N_400.jpg'2r = requests.get(url)34originNames = url.split("/")5renameFile = originNames[len(originNames) - 1]이렇게 하면 renameFile에 '4934761397078_N_N_400.jpg'라는 파일명을 담아서 사용할수 있다.
[Python ] 리스트 더 알아보기
리스트가 가진 다양한 기능
xxxxxxxxxx51- list.index( value ) : 값을 이용하여 위치를 찾는 기능2- list.extend( [value1, value2] ) : 리스트 뒤에 값을 추가 (‘+’연산자 보다 성능이 좋음)3- list.insert( index, value ) : 원하는 위치에 값을 추가4- list.sort( ) : 값을 순서대로 정렬5- list.reverse( ) : 값을 역순으로 정렬
xxxxxxxxxx211>>> list1 = ['a', 'b', 'q', 'f']2>>> list1.index('b')3145>>> list2 = [1, 2, 3]6>>> list1.extend(list2)7>>> list18['a', 'b', 'q', 'f', 1, 2, 3]91011>>> list1.insert(1, 'hi')12>>> list113['a', 'hi', 'b', 'q', 'f', 1, 2, 3]1415>>> list1.sort()16>>> list117[1, 2, 3, 'a', 'b', 'f', 'hi', 'q']1819>>> list1.reverse()20>>> list121['q', 'hi', 'f', 'b', 'a', 3, 2, 1]list와 string - .split(), .join()
리스트와 문자열은 유사하다.
xxxxxxxxxx61>>> my_list = [1, 9, 8, 5, 0, 6]2>>> my_str = 'hello world'3>>> 5 in my_list4True5>>> 'e' in my_str6True서로 변환이 가능하다.
- list = str.split() : 문자열 => 리스트, 공백시 스페이스 기준
- ” “.join( list ) : 리스트에서 문자열으로
xxxxxxxxxx191>>> char = list('hello')2>>> char3['h', 'e', 'l', 'l', 'o']45# string => list6>>> words = "python은 프로그래밍을 배우기에 아주 좋은 언어입니다."7>>> words_list = words.split()8>>> words_list9['python은', '프로그래밍을', '배우기에', '아주', '좋은', '언어입니다.']1011>>> time_str = "10:34:17"12>>> time_str.split(':')13['10', '34', '17']1415# list => string16>>> time_list17['10', '34', '17']18>>> ':'.join(time_list)19'10:34:17'slice
- slicing : 리스트나 문자열에서 값을 여러개 가져오는 기능
- list[ 시작:끝] 시작은 포함 되지만 끝 값은 포함되지 않는다.
xxxxxxxxxx51text = "hello world"2text = text[ 1:5 ] #index 1부터 ~ index 5 전(4)까지34list = [ 0, 1, 2, 3, 4, 5 ]5list = list[ 1:3 ]- slice를 하면 해당하는 부분의 리스트나 문자열을 새로 만들어 준다.
- 시작과 끝부분을 얻어 오는 방법 - list[ 2: ] : 2번째부터 끝까지 반환 - list[ : 2 ] : 처음부터 2번째 까지 반환 - list[ : ] : 처음부터 끝까지 전부 반환 (리스트를 복사해 둘 때 유용하게 사용됨)
step
slice한 값의 범위에서 step 값을 주어 그 값만큼 건너뛰어 가져오는 기능
- list[ 시작값:끝값:step ]
xxxxxxxxxx121>>> list1 = list(range(20))2>>> list13[0, 1, 2, 3, 4, 5, 6, 7, 8, 9, 10, 11, 12, 13, 14, 15, 16, 17, 18, 19]45>>> list1[5:15:3]6[5, 8, 11, 14]7>>> list1[15:5:-1]8[15, 14, 13, 12, 11, 10, 9, 8, 7, 6]9>>> list1[::3]10[0, 3, 6, 9, 12, 15, 18]11>>> list1[::-3]12[19, 16, 13, 10, 7, 4, 1]slice로 리스트 수정하기
삭제
- del list[ :5 ] : 처음부터 5번째 전까지 삭제
- 참고 : del 함수는 파이썬이 자체적으로 가지고 있는 삭제 함수이며 다음과 같이 사용한다.
xxxxxxxxxx21del 객체2# 객체란 파이썬에서 사용되는 모든 자료형을 말한다.
수정
- list[ 1:3 ] = [ 77, 88 ]
- list[ 1:3 ] = [ 77, 88 ,99 ] : 더 많은 개수로 변환
- list[ 1:4 ] = [ 8 ] : 더 적은 개수로 변환
xxxxxxxxxx131>>> numbers = list(range(10))2>>> numbers3[0, 1, 2, 3, 4, 5, 6, 7, 8, 9]45# 삭제6>>> del numbers[:5]7>>> numbers8[5, 6, 7, 8, 9]910# 수정11>>> numbers[1:3] = [66, 77]12>>> numbers13[5, 66, 77, 8, 9]우분투 18.04 VPN 자동 연결 설정
os/LINUX 2018.09.27 17:42
준비 사항
- 우분투 18.04
- ipTIME VPN서버 PPTP(암호화없음)
네트워크 매니저(GUI 방식)
- 16.04에는 네트워크 편집기에 VPN 자동연결 항목이 있음, 18.04에는 없음
- 기존 네트워크 편집기로 수정하면 가능함 - nm-connection-editor 실행
네트워크 매니저(CLI 방식)
네트워크 매니저 디렉토리에 새로운 연결을 만들 파일(vpn) 생성
xxxxxxxxxx11$ sudo vi /etc/NetworkManager/system-connections/vpn
- 본문내용
xxxxxxxxxx241[connection]2id=vpn <-- 노출되는 연결명3uuid=aff531e3-47bf-41db-b8ee-a7017e3e3e8a4type=vpn5autoconnect=false6permissions=78[vpn]9gateway=123.456.789.000 <-- vpn 서버 주소10password-flags=0 <-- 비밀번호 입력을 자동으로 할 경우11user=guest <-- vpn 사용자12service-type=org.freedesktop.NetworkManager.pptp1314[vpn-secrets]15password=00000000 <-- vpn 비밀번호1617[ipv4]18dns-search=19method=auto2021[ipv6]22addr-gen-mode=stable-privacy23dns-search=24method=auto
특정 연결이 네트웍에 연결될 경우 자동으로 vpn을 연결할 경우
- 특정 연결 열기
xxxxxxxxxx11$ sudo vi /etc/NetworkManager/system-connection/noname
[connection] 섹션에서
- secondaries=연결할 vpn 연결 파일의 uuid를 입력
xxxxxxxxxx11secondaries=aff531e3-47bf-41db-b8ee-a7017e3e3e8a;
- 네트워크 매니저를 재실행
xxxxxxxxxx11sudo systemctl restart NetworkManager
- 네트워크 현황 보기
xxxxxxxxxx11$ nmcli conn
- 특정 네트워크 연결 및 해제
xxxxxxxxxx21$ sudo nmcli conn up 특정 연결명(/etc/NetworkManager/system-connection)2$ sudo nmcli conn down 특정 연결명
ffmpeg WMV 만들기
xxxxxxxxxx11ffmpeg -i 002_RGB_IR.avi -vcodec wmv2 -acodec copy -q 0 002_IR.wmv01
Ubuntu에서 Python 버전을 변경하는 방법
사이트 :
Ubuntu에서 Python 버전을 변경하는 방법 (codechacha.com)
Ubuntu에서 시놀로지 open VPN 연결방법
간단하다.
xxxxxxxxxx11sudo openvpn --config VPNxxxx.ovpn
Windows 제어판에서 안보이는 프로그램 삭제
파워쉘에서 다음을 입력한다.
xxxxxxxxxx11gci "HKLM:\Software\Microsoft\Windows\CurrentVersion\Uninstall","HKLM:\Software\WoW6432Node\Microsoft\Windows\CurrentVersion\Uninstall"| Get-ItemProperty | Select-Object DisplayName,UninstallString,UninstallString_Hidden |fl > .\UninstallStrings.txt; .\UninstallStrings.txt
다음과 같이 된다.
xxxxxxxxxx61Copyright (C) Microsoft Corporation. All rights reserved.23새로운 기능 및 개선 사항에 대 한 최신 PowerShell을 설치 하세요! https://aka.ms/PSWindows45PS C:\Users\sdero> gci "HKLM:\Software\Microsoft\Windows\CurrentVersion\Uninstall","HKLM:\Software\WoW6432Node\Microsoft\Windows\CurrentVersion\Uninstall"| Get-ItemProperty | Select-Object DisplayName,UninstallString,UninstallString_Hidden |fl > .\UninstallStrings.txt; .\UninstallStrings.txt6PS C:\Users\sdero>UninstallStrings.txt 에 나타나 있는 프로그램을 검색하여 의심되는 프로그램을 삭제한다. 즉,
xxxxxxxxxx71DisplayName : Everything 1.4.1.1017 (x64)2UninstallString : C:\Program Files\Everything\Uninstall.exe3UninstallString_Hidden :45DisplayName : Git6UninstallString : "C:\Program Files\Git\unins000.exe"7UninstallString_Hidden :
이렇게 있으면 UninstallString 에 나타나 있는 Uninstaller 프로그램을 수행하여 제거한다.
윈도우 제어판 삭제하는 곳에 안 나타나는 모든 설치프로그램이 저 레지스트리 두곳 위치에 다 있습니다.
xxxxxxxxxx21HKEY_LOCAL_MACHINE\SOFTWARE\Microsoft\Windows\CurrentVersion\Uninstall2HKEY_LOCAL_MACHINE\SOFTWARE\WOW6432Node\Microsoft\Windows\CurrentVersion\Uninstall
여기에 있는 것을 정리하여 보여주는 것이다.